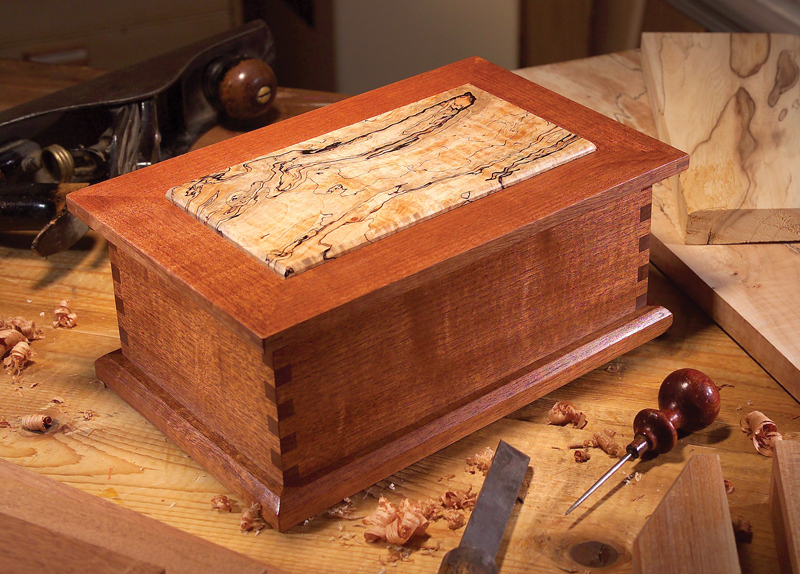
Hey there, fellow jewelry lovers! Do you ever feel like your jewelry collection is taking over your dresser? Or maybe you just want a beautiful and personalized place to keep your precious pieces? Well, I've got good news for you: You don't need to spend a fortune on a fancy jewelry box â€" we can build our own!
Let's be honest, there's something really special about making something with your own hands. Plus, you get to customize it to fit your style and your jewelry. Imagine, a box that’s as unique as you are!
So, grab your favorite tools, put on some music, and let's dive into this DIY project!
What you'll need:
Wood: You can use any kind of wood you like â€" pine, cedar, oak â€" whatever fits your budget and style. For a beginner, a softwood like pine is easier to work with. Think about the size you need, and consider whether you want a single box or a multi-tiered piece.
Wood glue: You'll need this to hold everything together.
Wood screws: Make sure to choose screws that are appropriate for the thickness of your wood.
Sandpaper: You'll need a variety of grits to smooth out the wood.
Paint or stain: This is where you can really make your jewelry box unique. Choose your favorite colors and finishes to create a look that's all your own.
Hardware: Hinges, latches, knobs â€" these will add the finishing touches to your box.
Optional extras: You might want to get some felt lining for the inside of the box, or maybe some decorative elements like beads or stencils.
Step 1: Planning and Design
Before we start chopping wood, let's plan out our box. Consider:
Size: How big does your jewelry box need to be? Do you need enough space for necklaces, bracelets, earrings, rings, and maybe even watches?
Shape: Want a classic rectangular box, or maybe something more unique like a hexagon? Maybe even a heart-shaped box for your most beloved pieces?
Compartments: Do you need separate compartments for different types of jewelry? You could add dividers, drawers, or even a ring roll to organize everything.
Step 2: Cutting and Assembling
Now for the fun part! Grab your trusty saw and cut the wood to the dimensions you've planned.
Base and Top: Start by cutting out the base and top of your box. Make sure they're the same size.
Sides: Cut out four pieces for the sides of the box. They should be the same height and width as the base and top, but their length should be slightly shorter to allow for the thickness of the wood.
Dividers: If you're planning to add compartments, cut out the pieces for your dividers.
Now it's time to assemble the box!
Glue: Use wood glue to secure the sides to the base. Make sure to apply a generous amount of glue along the edges and press them together firmly.
Clamps: To ensure a strong bond, clamp the pieces together and let the glue dry completely.
Screws: Once the glue is dry, reinforce the joints with wood screws. This will add extra strength and stability.
Step 3: Sanding and Finishing
Once the box is assembled, it's time to sand it down. Start with a coarser grit sandpaper (around 80 grit) to remove any rough edges and imperfections. Then gradually work your way up to a finer grit (around 220 grit) to achieve a smooth finish.
Painting or Staining: Now comes the fun part! Choose your favorite paint color or stain and apply it evenly to the box. For a more professional look, consider using a primer before painting.
Hardware: Install your hinges, latches, and knobs. Make sure everything is centered and lined up properly.
Step 4: Adding the Extras
Felt Lining: Add a layer of soft felt to the inside of the box. This will help to protect your jewelry and keep it scratch-free.
Compartments: If you're adding any dividers or drawers, attach them now using glue and screws.
Decorations: Get creative! You can add beads, stencils, or even decoupage to personalize your jewelry box.
A Few Extra Tips:
Practice makes perfect: If you're new to woodworking, don't be afraid to practice on scrap wood before starting on your jewelry box. This will help you get comfortable with the tools and techniques.
Safety first: Always wear safety glasses and a dust mask when using power tools.
Take your time: Don't rush the process. Take your time to measure, cut, and assemble carefully for a better result.
And there you have it! You've just created a beautiful and unique jewelry box that you can be proud of. Now you can organize your jewelry in style and keep it safe and secure. Go ahead, show off your new creation and enjoy the compliments!
Beyond the Basics:
Upcycle and Repurpose: Don't limit yourself to new wood! Consider using old wooden boxes, drawers, or even a wooden cutting board to give your jewelry box a vintage or rustic vibe.
Personalized Touches: Add your own personal touch to your box. You could paint it with a special design, add a monogram, or even decorate it with dried flowers.
Beyond Jewelry: This same project can be adapted for storing other items, like makeup, craft supplies, or even small tools! Just adjust the size and compartments to fit your needs.
Building a DIY jewelry box is a fun and rewarding project that allows you to express your creativity. So, get out there, gather your materials, and start building! You'll be surprised at what you can create.
0 comments:
Post a Comment