Alright, grilling fans, let's talk about taking your grilling game to the next level. Picture this: you're flipping burgers, sizzling veggies, and enjoying the company of friends and family, all while being protected from the elements. Sounds like a dream, right? Well, you can make that dream a reality with a DIY grill gazebo!
Building a grill gazebo is easier than you think, and it can be a weekend project that’ll pay dividends for years to come. Forget those flimsy, flimsy tarps that flap in the wind! We’re talking about a sturdy, stylish shelter that’ll make your grilling space the envy of the neighborhood.
Let’s Get Down to Business: Choosing the Right Material
First things first, you need to decide what material will make up your gazebo. You’ve got options, my friend!
Metal: Metal is strong, durable, and can withstand the elements. Think aluminum or steel. You'll find these pre-made as kits at your local home improvement store. These are generally heavier, but you can find lighter options if you’re willing to shop around.
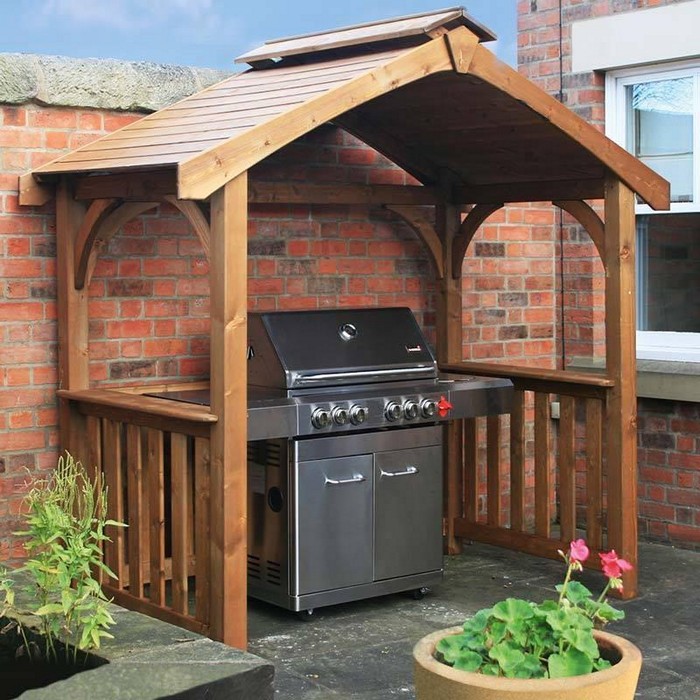
Wood: Wood provides a classic, natural look. It’s easy to work with, and you can get creative with the design. Keep in mind that wood requires more maintenance to prevent rotting and weathering.
PVC: PVC is light, affordable, and easy to assemble. It's great for smaller gazebos and temporary setups. Be mindful, it might not stand up to strong winds.
The Foundation of Your Grill Gazebo
Now that you’ve chosen your material, you need a solid foundation. This can be as simple as a concrete pad, a wooden deck, or even a patio. Just make sure the surface is level and can support the weight of the gazebo.
Time to Build Your Framework
Here’s where the fun (and some hard work) really begins. You’ll need:
Posts: These are the vertical supports that will hold up your roof. Use wood or metal posts based on your chosen material.
Rafters: Rafters are the horizontal beams that span between the posts. They form the base for your roof.
Connectors: You’ll need metal or wood connectors to join the posts, rafters, and roof panels.
Let's Talk Roof
Your roof is the crown jewel of your grill gazebo.
Fabric: Choose a weatherproof, durable fabric like canvas, vinyl, or polyester. They’re easy to maintain and come in a variety of colors and patterns.
Solid Panels: If you want a more permanent structure, consider using solid panels made of polycarbonate, fiberglass, or metal. These are more expensive, but they’ll provide better protection from the elements.
Shingles: For a traditional look, you can even opt for shingles. Just remember, this will require a steeper roof pitch.
Don’t Forget the Walls!
While not strictly necessary, walls can add privacy and further protect you from the wind and rain. Use the same materials as your roof, whether fabric or solid panels. You can even get creative and create a partial wall, allowing some natural light in.
Adding the Extras
Now that your grill gazebo is up and running, it’s time to add some finishing touches!
Lighting: Hang string lights, lanterns, or even install a ceiling fan with a light. This will create a cozy atmosphere for grilling after dark.
Storage: Add shelves or cabinets to keep grilling supplies organized.
Siding: If you’ve built a wooden gazebo, adding siding will provide extra protection and enhance its appearance.
A Word About Safety
It’s important to consider safety when building your grill gazebo.
Anchor it securely: Secure your gazebo to the ground using stakes, concrete anchors, or tie-downs. This will help keep it stable in strong winds.
Check for clearance: Make sure there’s enough clearance around the grill and the gazebo structure. You don’t want anything catching fire!
Use proper materials: Always use the right materials for the job. Check with your local building department for any specific requirements.
The DIY Advantage
Building your grill gazebo is a rewarding experience. You’ll have a custom-designed structure that fits your needs and style, and you’ll save money compared to buying a pre-made gazebo. Plus, you’ll get a sense of accomplishment knowing you built it with your own two hands!
Ready to Get Started?
Before you dive in, remember:
Plan it out: Draw a rough sketch of your gazebo and gather materials.
Choose your location: Pick a level, stable spot for your gazebo.
Get the right tools: You'll need basic tools like a saw, a hammer, screwdrivers, and a drill.
With a little planning and effort, you can create a grill gazebo that you’ll be proud to show off. It’ll be the perfect spot for hosting cookouts, enjoying the outdoors, and creating memories that’ll last a lifetime!
0 comments:
Post a Comment